The Shopify Buy Button is JavaScript library that allows one to embed products from their Shopify store into a web page. The Buy Button is highly configurable, and Shopify has an app that can guide one through the configuration process and output a JavaScript snippet with the desired options.
The app is a nice alternative for those that cannot perform or do not need to perform the coding necessary to configure it but, at the time of this writing, the options provided by the app hardly scratch the surface of what the Buy Button is capable of.
We recently had a client request some modifications to the look and feel of the button on their site. They were using the app to generate a snippet that displayed a collection, but were unable to configure it to meet their requirements. They wanted to:
- Remove the redundant price display
- Change the “view product” button click action to:
- Open the product’s Shopify page in the same tab
- Use the product’s Shopify URL without the query string parameters added by the Buy Button
Initially we were not sure if all of this was possible. The documentation covers a lot of ground but most of what the client needed was not covered. Thankfully the source code is public. And, after a bit of code spelunking and experimentation, we were able to achieve the desired results.
In this post we will delve into how we were able to meet these requirements.
Remove the Redundant Price Display
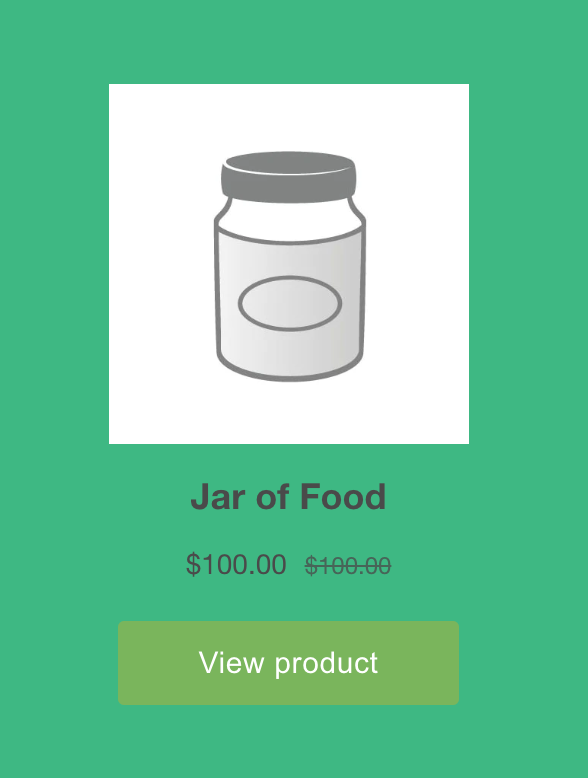
By default when a product’s compare at price is set both it and its regular price are rendered. The regular price is struckthrough to indicate it’s discounted. This is an appropriate default, but our client’s process often leaves them with a compare at price that is the same as the product’s current price.
The client’s theme accounted for this requirement but the Buy Button did not, leaving them with 2 versions of a product’s price being displayed:
One of the supported configurations is product rendering, where one can customize how the product is displayed via Mustache templates. And instead of one large “product” template, the Buy Button uses a template for each section of the product display.
Using small templates was a good design decision. Instead of having to maintain a single template that supports rendering the entire product we can focus on what we want to change: the price display.
To change the price display define a price template:
const priceTemplate = `
  <div class="{{data.classes.product.prices}}" data-element="product.prices">
    My custom Mustache template.
    Here's the price: {{data.formattedUnitPrice}}
  </div>
`;
And provide it to the templates option when creating the button:
// Snip Buy Button client configuration
// ...
// Create a based on a collection
ui.createComponent('collection', {
  options: {
    product: {
      templates: {
        // Add our custom template
        price: priceTemplate
      },
    }
  }
});
Within the price template we refer to the data variable. data is an instance of the Product component. The instance contains a bunch of properties. In this example we use two:
data.classes.product.pricesthe default CSS class for pricesdata.formattedUnitPricea property on theProductcomponent that returns the product’s price, formatted in the shop’s currency.
Most information about the product is accessible in the Mustache template via the data variable: data.selectedVariant, data.selectedQuantity, etc…
Becoming familiar with the Product component’s properties (by looking at its source) will help with most
template customization scenarios.
Having the ability to customize how the product’s price is displayed lead us to our next question: how can we add the logic necessary to achieve the price display requirement?
Adding Custom Properties and Functions to the Mustache Template
We know we can customize how the product’s price is displayed, but how to remove the redundant price/compare at price display? The template has access to all the product information, so it should be a matter of adding the following logic to our template (pseudocode):
if product.compare_at_price && product.price != product.compare_at_price
  Display product.compare_at_price
end if
Great! But there is one problem: Mustache is logicless template language. In a Mustache template one cannot conditionally render by comparing values. In the Mustache world, comparisons like this must be done from outside the template, via a function that is called from the template.
To achieve this it provides the viewData property.
Using viewData we can define functions or values that can be accessed from within the template:
const priceTemplate = `...`;
// ...
// Create Buy Button based on a collection
ui.createComponent('collection', {
  options: {
    product: {
      // Custom data for our templates
      viewData: {
        foo: 'bar',
        someFunction: () => 123;
      },
      templates: { price: priceTemplate }
    }
  }
});
Functions added to viewData have access to the product’s properties, providing us with a way to employ custom business logic. Instead of putting the logic in the template, we put it in a function, and then call that function from the template.
To remove the redundant pricing, we created a function named hasDifferentCompareAtPrice:
const priceTemplate = `...`;
// ...
// Create Buy Button based on a collection
ui.createComponent('collection', {
  options: {
    product: {
      viewData: {
        // Custom function to use in the Mustache template
        hasDifferentCompareAtPrice: function() {
          // Check product pricing properties
          return this.compareAtPriceV2 && this.priceV2.amount !== this.compareAtPriceV2.amount;
        }
      },
      templates: { price: priceTemplate }
    }
  }
});
Then we updated our template to render conditionally based on the return value of the hasDifferentCompareAtPrice function:
<span class="{{data.classes.product.price}}" data-element="product.price">
{{data.formattedPrice}}
</span>
{{#data.hasDifferentCompareAtPrice}}
<span class="visuallyhidden">{{data.compareAtPriceAccessibilityLabel}} </span>
<span class="{{data.classes.product.compareAt}}" data-element="product.compareAt">
{{data.formattedCompareAtPrice}}
</span>
{{/data.hasDifferentCompareAtPrice}}
One important point to note is that the scope of the viewData function (its value of this)
is set based on how it’s called in the Handlebars template. If we had the following template:
{{#data.selectedVariant}}
  {{data.someFunction}}
{{/data.selectedVariant}}
data.someFunction would be scoped to the variant and have access to its properties.
The top-level data object is not in scope and therefore not accessible.
If you execute the function outside of the template’s {{#data.selectedVariant}}
block, this is scoped to its Product component, and has access to data.
Change the View Product Button’s Click Action
By default it will render a “view product” button for each product shown. Clicking the button will open the product in a modal. We needed to change this in two ways:
- Open the product’s Shopify page in the same tab
- Use the product’s Shopify URL without the query string parameters added by the Buy Button
Open the Product’s Shopify Page in the Same Tab
Sending the user to the product’s page on the main Shopify site is easy, it’s documented. Just set the buttonDestination option to 'onlineStore':
// Create Buy Button based on a collection
ui.createComponent('collection', {
  options: {
    product: { buttonDestination: 'onlineStore' }
  }
});
Now when the “view product” button is clicked the product’s page will open in a new tab. This is a good start, but in our case we needed to open the page in the same tab. A requirement that appeared unsolvable until we came across Andrew Drach’s comment on a Buy Button GitHub issue.
In Andew’s comment we saw that it was possible to provide a function to the buttonDestination property, and that the function is passed an instance of the Product component. With this bit of knowledge we constructed the following:
// Create Buy Button based on a collection
ui.createComponent('collection', {
  options: {
    product: {
      buttonDestination: function(product) {
        window.location = product.onlineStoreURL;
      }
    }
  }
});
Here we fetch the URL of the Shopify product page via the Product component’s onlineStoreURL property.
We then assign it to the browser’s window.location property, which will open the URL in the current tab.
The onlineStoreURL property returns the URL with the Buy Button’s default query string parameters. Removing these is our final requirement.
Remove the Query String Parameters
When it opens a Shopify product page the URL contains the following query string:
?channel=buy_button&referrer=URL&variant=VARIANT_ID
As we saw in the previous section, the product page URL is retrieved from
the Product component’s onlineStoreURL property. This property constructs the URL by combining the return values of
a couple of other properties. The one we care about is onlineStoreParams. It returns the query string parameters that will be added to the URL. The parameters the client wanted removed. The code looks like this:
get onlineStoreParams() {
   return {
     channel: 'buy_button',
     referrer: encodeURIComponent(windowUtils.location()),
     variant: atob(this.selectedVariant.id).split('/')[4],
   };
}
Unfortunately there is no formal way to override the returned object.
Making such an addition would be would be trivial.
We can add support for an onlineStoreParams configuration option:
ui.createComponent('collection', {
  options: {
    product: {
      // Our new option
      onlineStoreParams: { channel: null, referrer: null }
    }
  }
});
And update onlineStoreParams to check for it:
get onlineStoreParams() {
   // Override the default params with those provided by our onlineStoreParams option
   const params = Object.assign({
     channel: 'buy_button',
     referrer: encodeURIComponent(windowUtils.location()),
     variant: atob(this.selectedVariant.id).split('/')[4],
   }, this.options.onlineStoreParams);

   // Delete params without a value
   for(let key in params)
     if(params[key] === null)
       delete params[key];

   return params;
}
But using a custom build was not a good option for us.
Normally we’d consider opening a pull request with these changes but the repository’s activity is minimal, with no merges since 2021-10, making this option nonviable too.
This left us with one remaining option. An option that we’d normally stay away from: overriding Shopify’s definition of onlineStoreParams with our own. This type of modification normally puts one on the road to bugs but this case was a bit different:
- The property is simple and is only used for query string parameters
- We will override it at the end of button’s life cycle
- What are the alternatives‽
We chose to override the property in the buttonDestination function we created in the previous section:
// Create Buy Button based on a collection
ui.createComponent('collection', {
  options: {
    product: {
      buttonDestination: function(product) {
        // Define our version of the property without al the query string parameters
        Object.defineProperty(
          product,
          'onlineStoreParams',
          { get: () => ({ variant: atob(this.selectedVariant.id).split('/')[4] }) }
        );
        window.location = product.onlineStoreURL;
      }
    }
  }
});
Now when onlineStoreURL is assigned to window.location it ends up calling our implementation of onlineStoreParams,
opening a URL in the same tab and without the query string parameters. Exactly as the client wanted.
Note that keeping the variant parameter was necessary. Without it products with variants would not open
with the given variant selected.
The Final Snippet
With all our additions we end up with a snippet that looks (mostly) like this:
const priceTemplate = `
<span class="{{data.classes.product.price}}" data-element="product.price">
{{data.formattedPrice}}
</span>
{{#data.hasDifferentCompareAtPrice}}
<span class="visuallyhidden">{{data.compareAtPriceAccessibilityLabel}} </span>
<span class="{{data.classes.product.compareAt}}" data-element="product.compareAt">
{{data.formattedCompareAtPrice}}
</span>
{{/data.hasDifferentCompareAtPrice}}
`;
// Snip Buy Button client configuration
// ...
// Create a based on a collection
ui.createComponent('collection', {
options: {
product: {
buttonDestination: function(product) {
Object.defineProperty(
product,
'onlineStoreParams',
{ get: () => ({ variant: atob(this.selectedVariant.id).split('/')[4] }) }
);
window.location = product.onlineStoreURL;
},
templates: { price: priceTemplate },
viewData: {
hasDifferentCompareAtPrice: function() {
return this.compareAtPriceV2 && this.priceV2.amount !== this.compareAtPriceV2.amount;
}
}
}
}
});
Conclusion
The Buy Button is highly configurable but in many cases doing so via the app will not suffice. Code-level configuration is necessary and really where its modular design and flexibility start to shine.
In our case we were able to use code-level configuration to successfully implement the client’s requirements. That is not to say you can customize everything, or even replicate commonplace theme functionality. To the contrary. The repository’s GitHub issues are sprinkled with unatainable use cases. Do you need to create line items with custom attributes? Not so fast.
The documentation could also be better. Most of our time was spent searching GitHub issues, reading the source code, and writing experiments to achieve functionality that could have been realized in minutes if it was documented. GitHub issues provide a wealth of information and, if you cannot find what you’re looking for in the documentation, we recommend searching them as the next step.
Earlier in this post we mentioned the repository has not been updated since 2021-10. With this some are questioning if Shopify is more focused on new technologies like Hydrogen and is preparing to give up on the Buy Button. Certainly something to consider but either way, it remains a highly configurable way to embed products from a Shopify store into a web page.